Article: How to Align a Turntable Cartridge
How to Align a Turntable Cartridge
A well-aligned cartridge sounds calm. Voices stand clearly between the speakers, sibilants stay clean, and the last track on a side sounds as composed as the first. Getting there takes about fifteen minutes and a good protractor. This guide explains what alignment means and walks you through it step by step.
Why alignment matters
When a record is cut, the cutting head travels across the lacquer in a straight line from the edge towards the centre. A pivoted tonearm cannot do that. It swings in an arc, so the stylus meets the groove at a slightly different angle at almost every point of the side. This angle is called tracking error.
Tracking error cannot be removed entirely, but it can be kept small. A misaligned cartridge reads the two groove walls unevenly. You hear it as harsh sibilants, a less stable stereo image and more distortion towards the end of a side. Stylus and record also wear less evenly.
Overhang, offset angle and null points
Alignment comes down to two settings:
- Overhang: how far the stylus reaches past the centre of the spindle. You set it by sliding the cartridge forward or back in the headshell.
- Offset angle: the angle at which the cartridge sits in the headshell. You set it by turning the cartridge slightly.
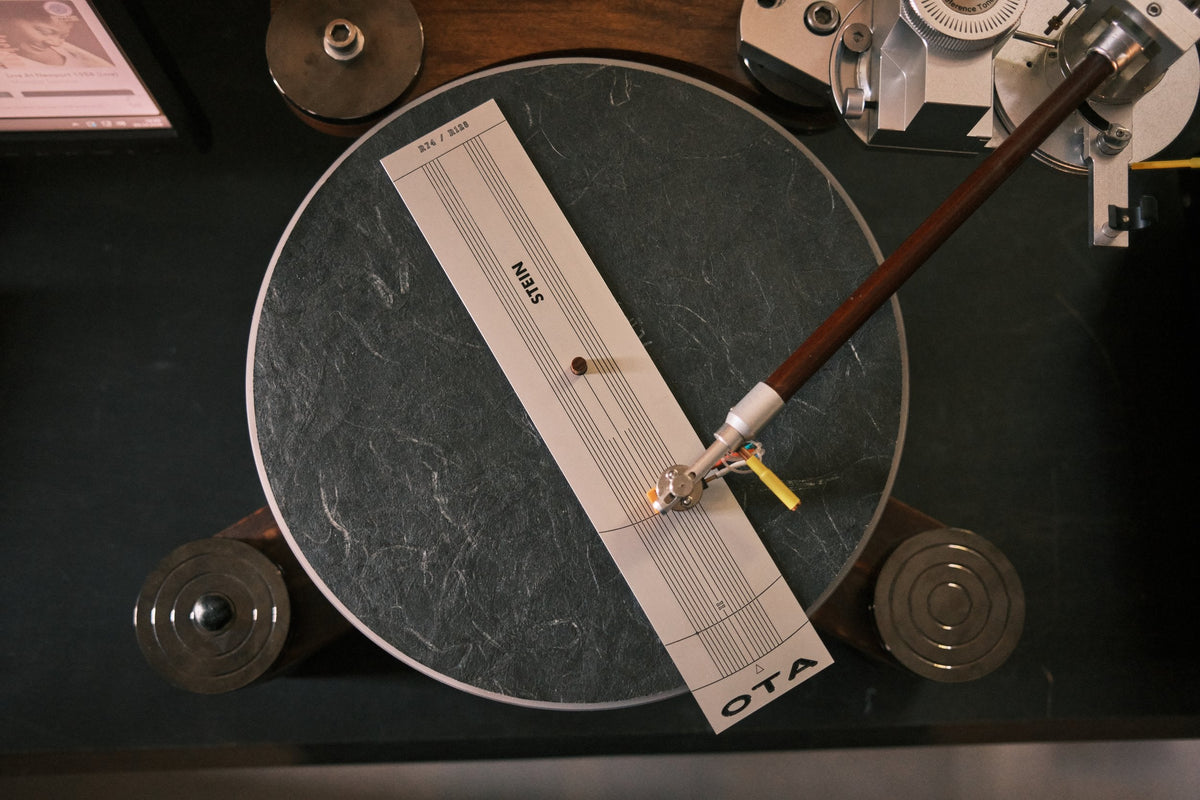
Set correctly, the stylus sits exactly in line with the groove at two points on the record. These are the null points. Between and around them the error stays small. A two-point protractor shows both null points, so you can check overhang and offset without knowing your tonearm's exact dimensions.
Why the geometry makes a difference
Where the null points sit is a matter of geometry. Established geometries differ mainly in how they balance the error between outer and inner grooves. Many of them calculate with grooves that run almost to the label.
On most records the music ends earlier. The Achat 1 therefore uses its own OTA geometry with null points further out, at 74 and 128 mm. The largest tracking error stays at around 1.2 degrees, compared with up to 2.1 degrees for a DIN alignment (calculated for a mounting distance of 211 mm). The error is spread more evenly across the area where the music actually is, so a side sounds settled from the first track to the last.
What you need
- A two-point protractor, such as the Achat 1 cartridge alignment protractor
- A small screwdriver or hex key for the cartridge screws
- Good light and, if possible, a magnifier
- Your usual platter mat on the platter, since it changes the height at which the protractor sits
How to align a turntable cartridge, step by step
1. Prepare the turntable. Level the turntable, place the mat you play with on the platter and set the tracking force roughly to the cartridge manufacturer's value. Loosen the cartridge screws just enough that the cartridge moves with light pressure.
2. Place the protractor. Put it over the spindle so it lies flat. Keep the stylus guard on while you move the arm by hand and remove it only to lower the stylus.

3. Outer null point. Lower the stylus gently onto the outer null point (R128 on the Achat 1). Turn the protractor on the spindle until the stylus lands exactly on the mark. Now look from above: the cartridge should run parallel to the guide lines. If it does not, turn it slightly in the headshell.

4. Inner null point. Move the arm to the inner null point (R74), turn the protractor and lower the stylus again. If the stylus lands in front of or behind the point, slide the cartridge forward or back. Check the angle against the lines once more.
5. Go back and forth. Each correction at one point changes the other a little. Alternate between the two until the cartridge sits right at both without further adjustment. Two or three rounds are usual.
6. Tighten and check. Tighten the screws evenly, a little at a time, so the cartridge does not twist. Then check both null points one last time.

Align by the cantilever and stylus where you can see them, not only by the cartridge body. The body is not always exactly square to the cantilever.
After the alignment
The protractor sets overhang and offset angle. Four further settings complete the setup and are made with other tools:
- Tracking force: set precisely to the cartridge manufacturer's value with a stylus gauge.
- Anti-skating: as a starting point, the same value as the tracking force.
- Arm height (VTA): so the tonearm runs roughly parallel to the record with the stylus lowered.
- Azimuth: so the stylus stands upright in the groove when seen from the front.
Printed template or precision protractor?
Printable paper protractors are freely available and a reasonable place to start. Their limits are practical. A printer rarely scales to the exact millimetre, paper bends and shifts, and the centre hole sits loosely on the spindle. A small error at the spindle becomes a larger one at the null points.

A protractor made of stainless steel stays flat and dimensionally stable, fits the spindle snugly and gives the same result at every cartridge change. That is what the Achat 1 was made for: handmade in Germany, with its null points marked R74 and R128 and parallel guide lines at both. Discover the Achat 1 turntable cartridge alignment protractor.
Frequently asked questions
How do I know if my cartridge is misaligned?
Typical signs are harsh sibilants, a stereo image that leans to one side and distortion that grows towards the end of a side. If you notice these, checking the alignment is a good first step.
Does a two-point protractor work with every tonearm?
It works with nearly all pivoted tonearms, because it checks the result at the null points rather than relying on the arm's dimensions. Linear tracking arms follow the groove in a straight line and need no protractor of this kind.
How often should I check the alignment?
At every cartridge change, after moving or transporting the turntable, and occasionally in between. With a protractor at hand it takes a few minutes.
Which geometry should I choose?
There is no single right answer. Each geometry places its null points according to where it considers the error most important. The OTA geometry of the Achat 1 concentrates on the area of the record where the music is.
More for your turntable: Turntable accessories and the Perfect Interface turntable mat.